• Home
  • About
    • Simply… Nicole
    • Simply… Sara
  • Food
  • Family
  • Lovelies
  • Contact
  • Advertise
  • Recipe Index

Apple Pie Breakfast Bowl

October 21, 2015

Apple Pie Breakfast Bowl Apple Pie Breakfast Bowl //

Hello, friends… we hope you’re all enjoying the fall season! Nicole and I have been staying busy with our little ones. We love having spare time to share our favorite recipes here on Simply! We also are super fortunate to be contributors over at the fabulous, Simple As That Blog! We recently shared an irresistible recipe for an APPLE PIE BREAKFAST BOWL. This dish is a new favorite… and we hope it becomes one of yours, too! 

Apple Pie Breakfast Bowl - a thick vanilla chia seed pudding topped with fall favorites!

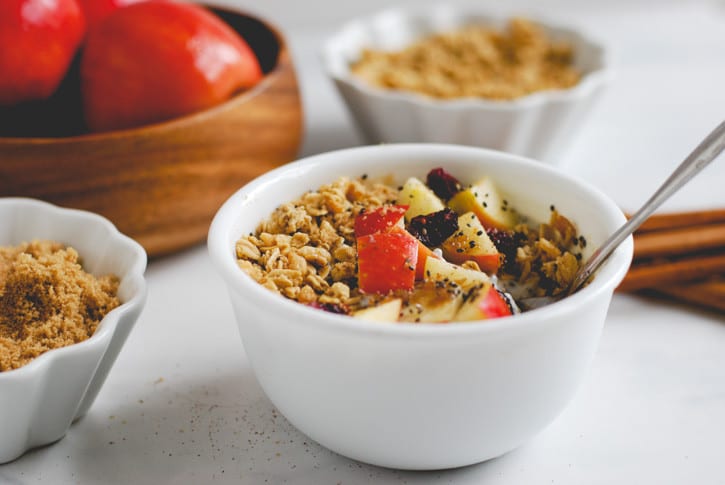
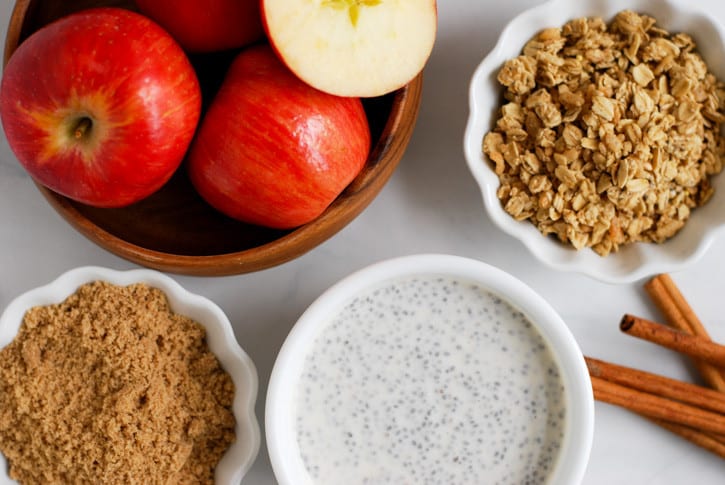
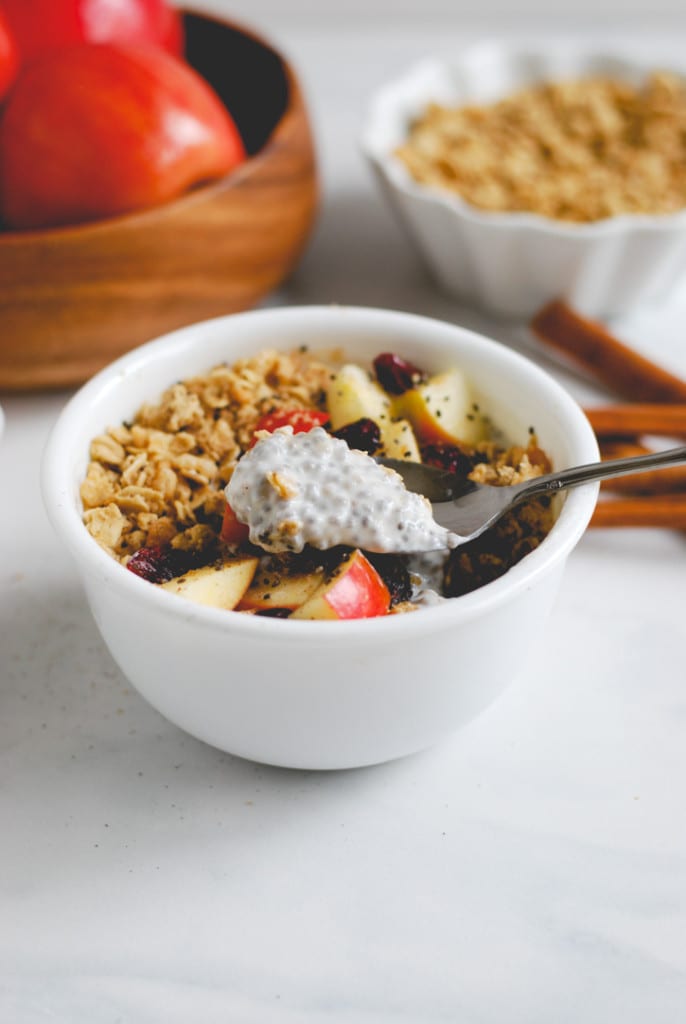
The base of this bowl is a rich, creamy vanilla chia seed pudding. Greek yogurt, almond milk, pure maple syrup, a touch of vanilla, and loads of healthy chia seeds create the thick, slightly-sweet mixture. Sliced crisp apples, crunchy granola, dried cranberries, a dash of cinnamon, and a sprinkling of brown sugar top the pudding, making it the tastiest fall breakfast that your whole family will love! Take a peek over at Simple As That to get the recipe details! Enjoy, friends! {xo}

Apple Pie Breakfast Bowl (a recipe by Simply Happenstance for Simple As That Blog)!

Find our berry version of this breakfast dish ==> HERE! 


Filed Under: Food

Triple Berry Smoothie Pops

August 16, 2015

Triple Berry Smoothie Pops -15
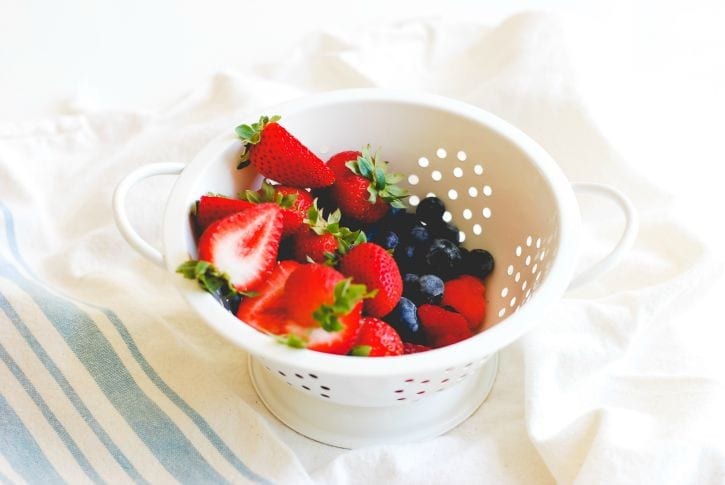
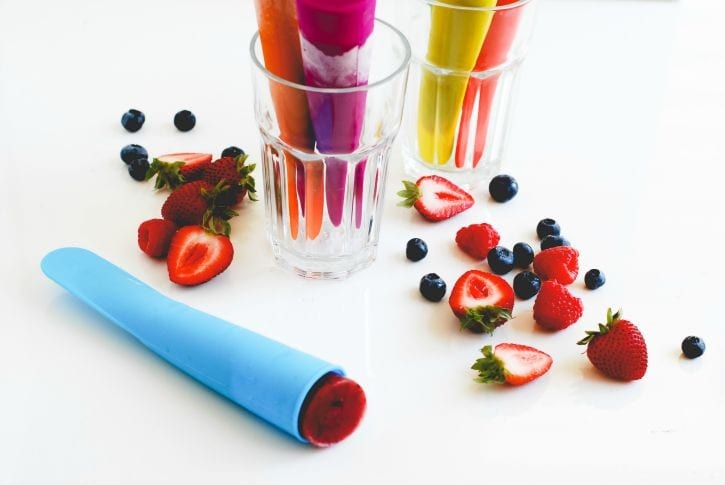
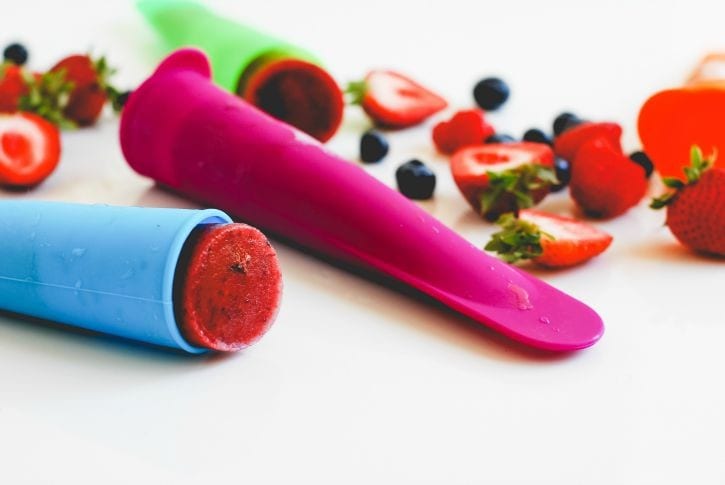
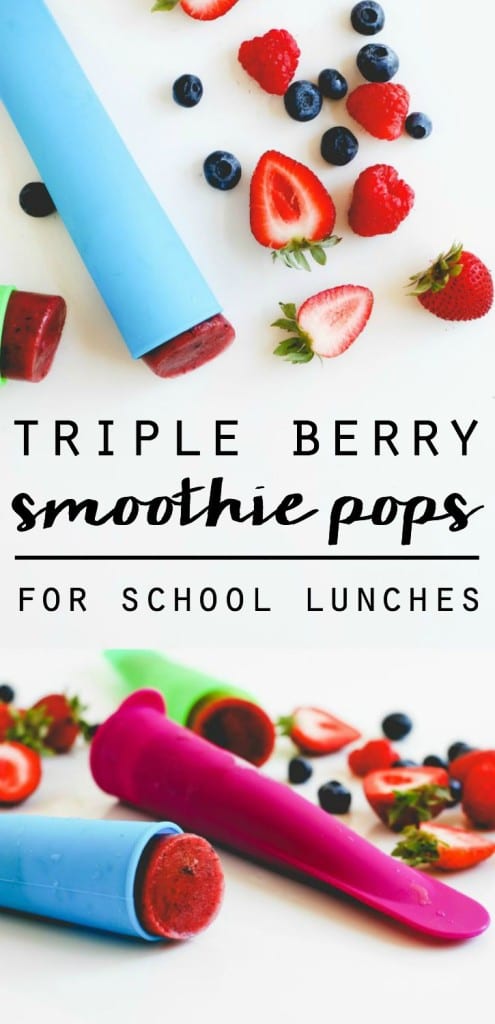
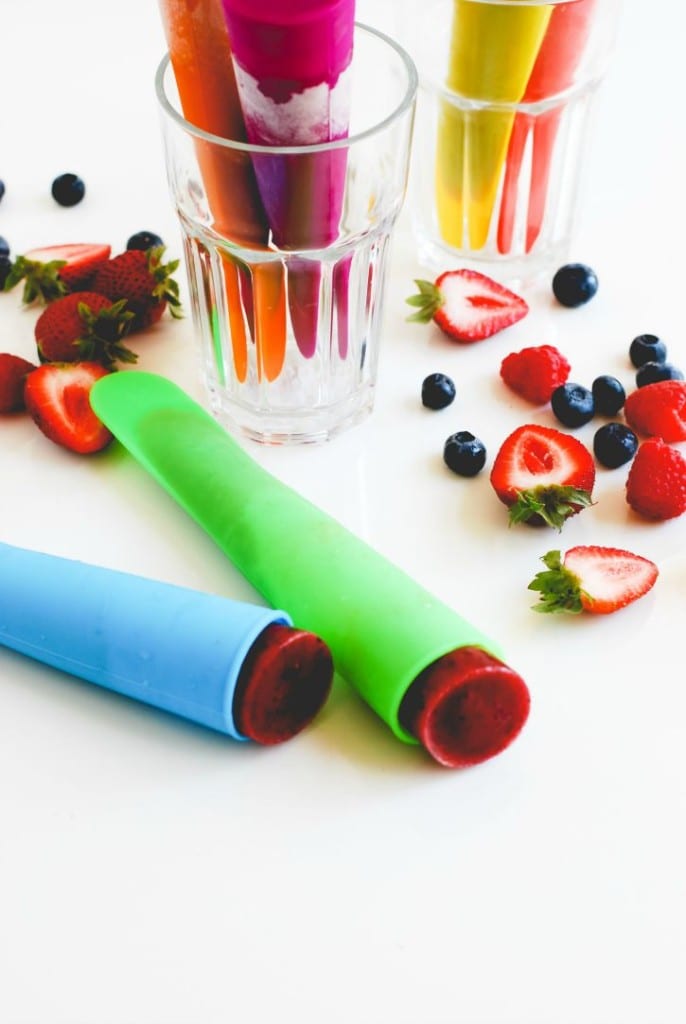
Triple Berry Smoothie Pops // For School Lunches
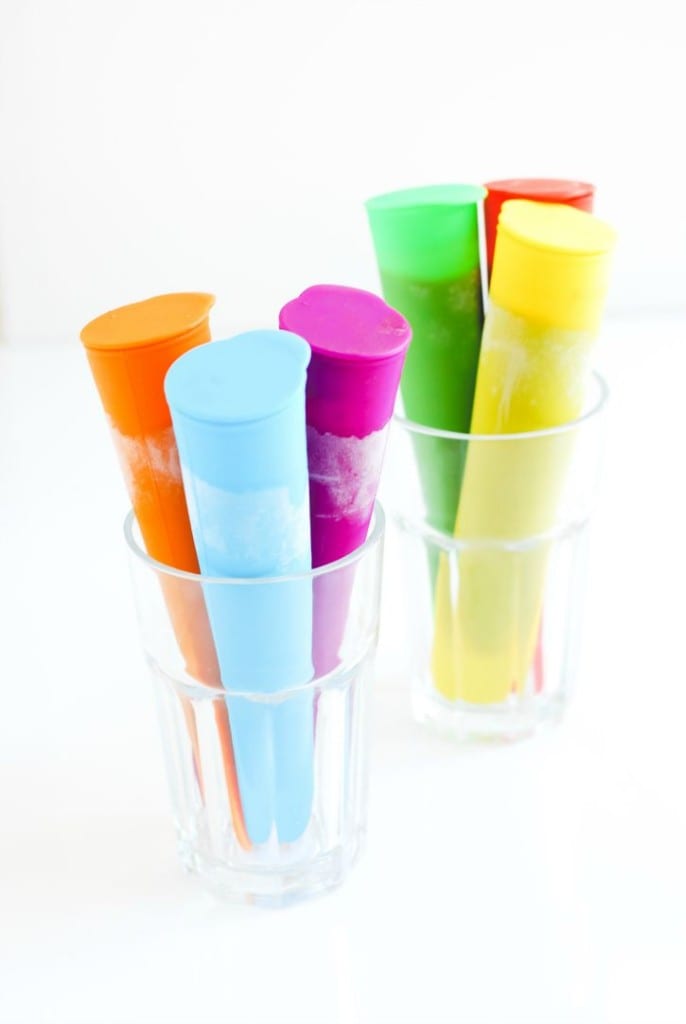
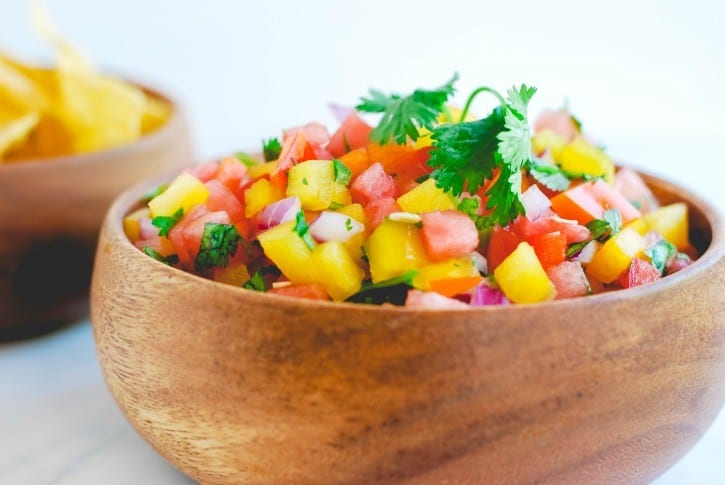
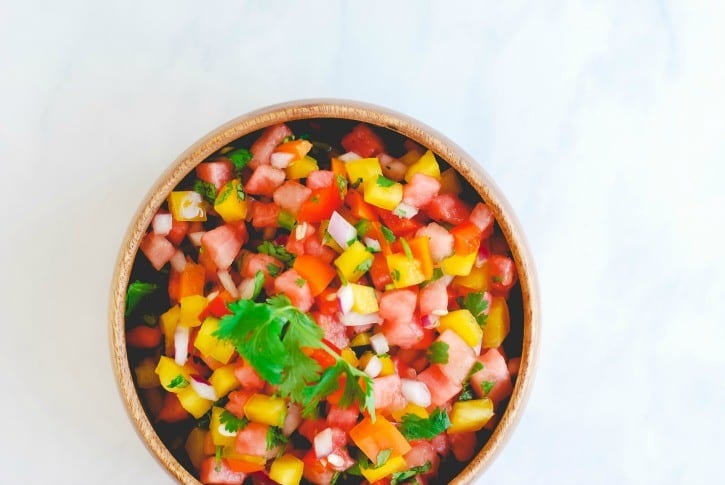
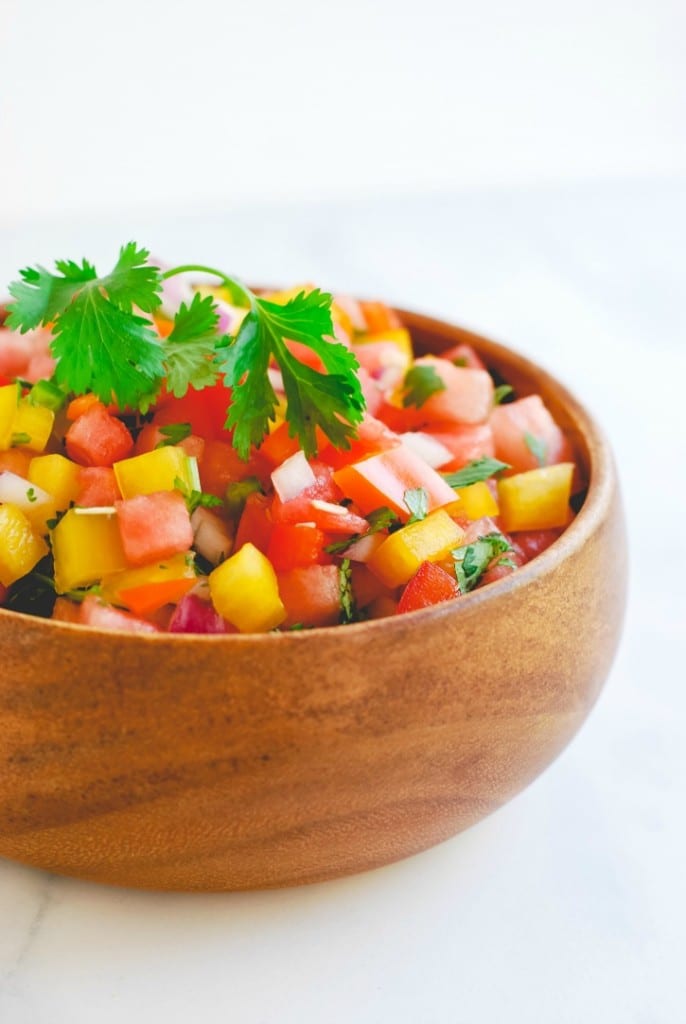
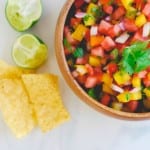
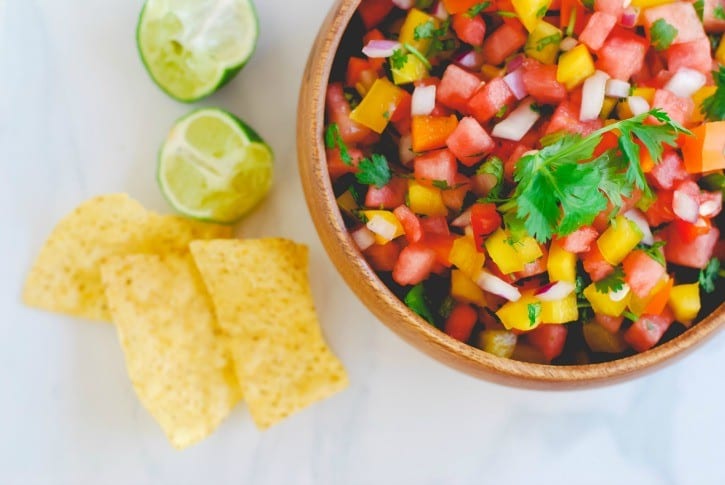
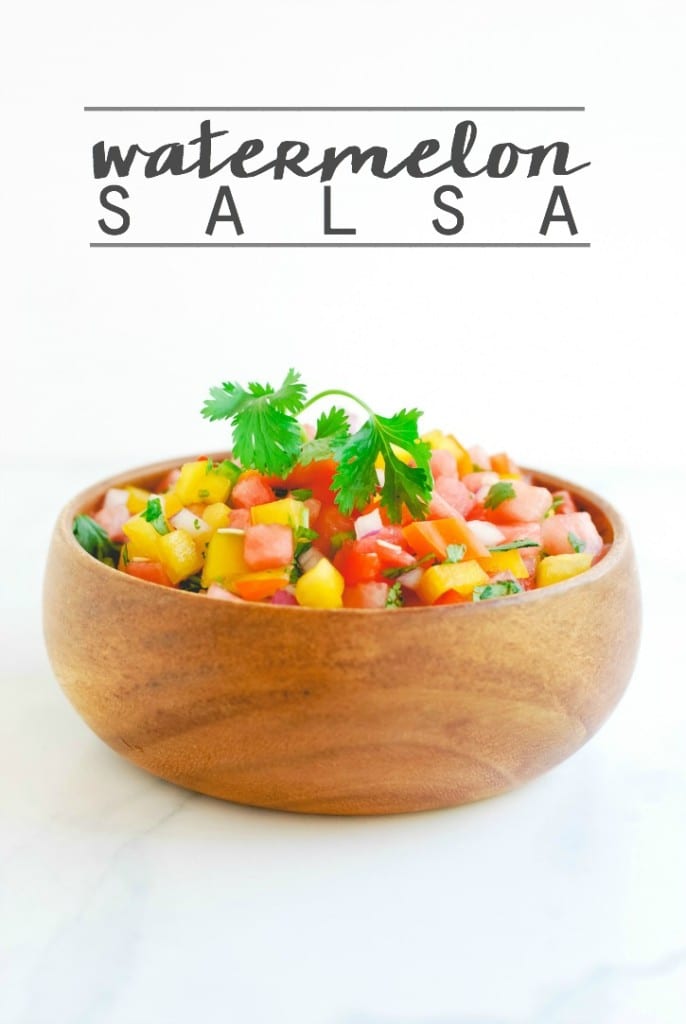
Well, it’s hard to believe… but summer vacation is officially over for my crew. Boy that went by fast! Two months out of school surely wasn’t enough! We fit in a couple road trips to far off places, a week of VBS, and some time visiting with close friends. Besides that…. we soaked up the down time together.

I’m still in denial about the school schedule and extra curricular activities. I don’t personally love being tied down to a schedule, so it’s something I struggle with every year. We’ve embarked on quite a few big changes in our family… one being the start of middle school for my oldest (wish us luck)! I hope to update the blog with photos of our summer adventures and news about this new chapter in our lives. Until then… let’s talk school lunches! 

I have to admit that I fell into a rut last year when packing their daily lunches. My oldest is pretty picky and won’t eat typical lunch items. I found myself making three to four different lunches every day. My goal was always to provide them with a healthy variety of foods, but towards the end of the school year… I was completely over it all! 

This year, I’ve started thinking about different things I could include to mix things up. I watched a few videos on school lunches, including this one from 100 Days of Real Food. I really appreciated her ideas about making at least one thing in their lunches ahead of time (like soup, homemade uncrustables, muffins, or even frozen smoothie pops)!

Triple Berry Smoothie Pops -7

That brings me to this post! I purchased these super cool silicone mighty pop reusable holders from Sunsella. They’re durable, dishwasher safe, and easy to use! Simply fill with your favorite smoothie recipe, freeze, and pop into your kids’ school lunches! 

Triple Berry Smoothie Pops -3

I don’t tend to use smoothie recipes… I prefer throwing in the fresh/frozen fruit that I have on hand. I always add a few things to make them even healthier, too … such as almond milk, coconut water, greek yogurt, nut butters, and/or chia seeds. I included some helpful tips, links to buying the molds, and also a Triple Berry Smoothie Pop recipe for you to try out! Happy lunch packing, friends!

Triple Berry Smoothie Pops -11

TIPS & LINKS //

  • Mix up your favorite healthy smoothie recipe and use a funnel to fill your silicone molds. I used this funnel from Oxo. (There is also an optional strainer you can attach to the funnel for those of you that have picky kids that don’t like chunks of fruit in their frozen pops). I used these Sunsella Mighty Pops for the mold.  
  • Leave approximately one-inch of room at the top of the mold to allow for expansion once the smoothie mixture freezes. 
  • Freeze overnight or for a minimum of 4-6 hours. 
  • Depending on your insulated lunch box, the pops may stay frozen, or turn into a cold drinkable smoothie! 
  • This is a simple recipe that the kids can help with! From my experience, if they help, they tend to be more open to trying new things! 
Print Recipe
5 from 1 vote

Triple Berry Smoothie Pops

A simple way to add healthy smoothies to your kids' school lunches!
Prep Time10 minutes mins
Total Time10 minutes mins
Course: School Lunches
Servings: 6
Author: Simply Happenstance

Ingredients

  • 2 cups of coconut water
  • 2 cups of fresh or frozen berries I used strawberries, blueberries and raspberries
  • 1 ripe banana
  • 1 tablespoon chia seeds
  • 1-2 tablespoons honey

Instructions

  • Add all of the ingredients into your blender.
  • Blend on high for approximately 1 minute until smooth.
  • Add in more coconut water if the mixture appears too thick.
  • Using a funnel, pour smoothie mixture into silicone molds. (I used large plastic tumblers to hold the molds in place while I poured in the liquid.)
  • Leave one-inch of room at the top of the mold to allow for expansion when the smoothie freezes.
  • Place lids on molds and freeze (standing upright -- I placed my tumblers in the freezer) for 4-6 hours.
  • These can be made ahead of time and used as desired in school lunches, for quick breakfasts, or for snacks!
  • Enjoy!


Triple Berry Smoothie Pops -19

Triple Berry Smoothie Pops || For School Lunches!

sarasignature3 copy

Filed Under: Food, Simply Obsessed

Watermelon Salsa

June 30, 2015

Watermelon Salsa - a simple, yet flavorful appetizer for your summer festivities! (recipe on simplyhappenstance.com)Watermelon Salsa //

There’s nothing better than a quick and simple homemade salsa! The flavors are robust and so fresh with a medley of vegetables, cilantro, and…. WATERMELON (the secret ingredient that has made this my new summertime favorite)! 

Watermelon Salsa - a summertime favorite (recipe via simplyhappenstance.com)-23

This Watermelon Salsa is delicious served as an appetizer with some salty tortilla chips … or it can be used as a fresh topping on poultry or fish. (I even love eating it completely plain — straight out of the bowl with a spoon!) You can even add a heaping spoonful into the center of a sliced avocado and eat it for lunch. (YUM!)

Watermelon Salsa - a summertime favorite (recipe via simplyhappenstance.com)-12

The salsa will remind you of your favorite pico de gallo, only better! The sweet bites of watermelon… combined with chopped bell peppers, jalapeño, red onion, and cilantro balance the amazing flavors present in the dish!

Watermelon Salsa - a summertime favorite (recipe via simplyhappenstance.com)-32

Not only is it clean and healthy… it’s pretty to look at, too! Don’t you think? 

Watermelon Salsa - a summertime favorite (recipe via simplyhappenstance.com)-35

This Watermelon Salsa would taste fabulous with roasted corn, black beans, chunks of fresh avocado, or sliced cherry tomatoes thrown in the mix. (I love a recipe that’s easy to customize according to what you have on hand!) It’s the perfect appetizer to bring to an upcoming Fourth of July Party or summertime soiree! Enjoy, friends!
Watermelon Salsa - a summertime favorite (recipe via simplyhappenstance.com)-55

Watermelon Salsa - a deliciously simple appetizer perfect for all of your summer festivities! (Recipe on simplyhappenstance.com)! #FourthofJuly #HomemadeSalsa #Watermelon
Print Recipe

Watermelon Salsa

This tasty Watermelon Salsa is filled with healthy, fresh ingredients! It's a simple Fourth of July appetizer or summer potluck dish!
Prep Time15 minutes mins
Total Time15 minutes mins
Course: Appetizer
Servings: 8 -12
Author: Simply Happenstance adapted from Pioneer Woman

Ingredients

  • 1/2 whole Small Seedless Watermelon Diced
  • 1/2 whole Red Onion Diced
  • 1 whole Red Bell Pepper Seeded and Diced
  • 1 whole Green Bell Pepper Seeded and Diced
  • 1 whole Yellow Bell Pepper Seeded and Diced
  • 2 whole Jalapeños Seeded and Diced
  • 1 whole Bunch Fresh Cilantro Chopped
  • 1-2 whole Limes Juiced
  • 1/2 teaspoon Sea Salt

Instructions

  • Combine all prepared ingredients in a medium-sized mixing bowl. Give it a good stir and chill in the refrigerator until ready to serve. Keeps for one day, so get those chips ready!
  • *Optional ingredients // sliced avocado, sliced cherry tomatoes, black beans, and/or roasted corn.

Notes

Serve fresh salsa with tortilla chips for an appetizer, or scoop into one half of an avocado and eat for lunch! Also delicious as a topping for poultry and fish.
Original recipe from The Pioneer Woman // https://thepioneerwoman.com/cooking/2013/06/watermelon-pico-de-gallo/


Watermelon Salsa - a summertime favorite (recipe via simplyhappenstance.com)-81

sarasignature3 copy

Filed Under: Food

Blueberry Cheesecake Ice Cream

May 14, 2015

Homemade Blueberry Cheesecake Ice Cream for Simple As That Blog-14Blueberry Cheesecake Ice Cream //

Howdy, friends! Nicole and I had the privilege of sharing a delicious dessert recipe on one of our very favorite blogs… Simple As That! I hope that you’ll make the jump over to Rebecca’s lovely site to take a peek! 

Homemade Blueberry Cheesecake Ice Cream for Simple As That Blog-9

The recipe is an all-time childhood favorite of mine, recreated for my own kids to enjoy! If you have an automatic ice cream maker, this dish is quick to make and you won’t believe the flavor combination – creamy cheesecake ice cream with a thick ribbon of crunchy graham cracker crumbs and delicious homemade blueberry sauce! It’s a keepsake recipe… for sure! I hope you enjoy it! 

Homemade Blueberry Cheesecake Ice Cream for Simple As That Blog-11

sarasignature3 copy


Filed Under: Food

Protein Packed Energy Bites

April 28, 2015

Protein Packed (No-Bake) Energy Balls
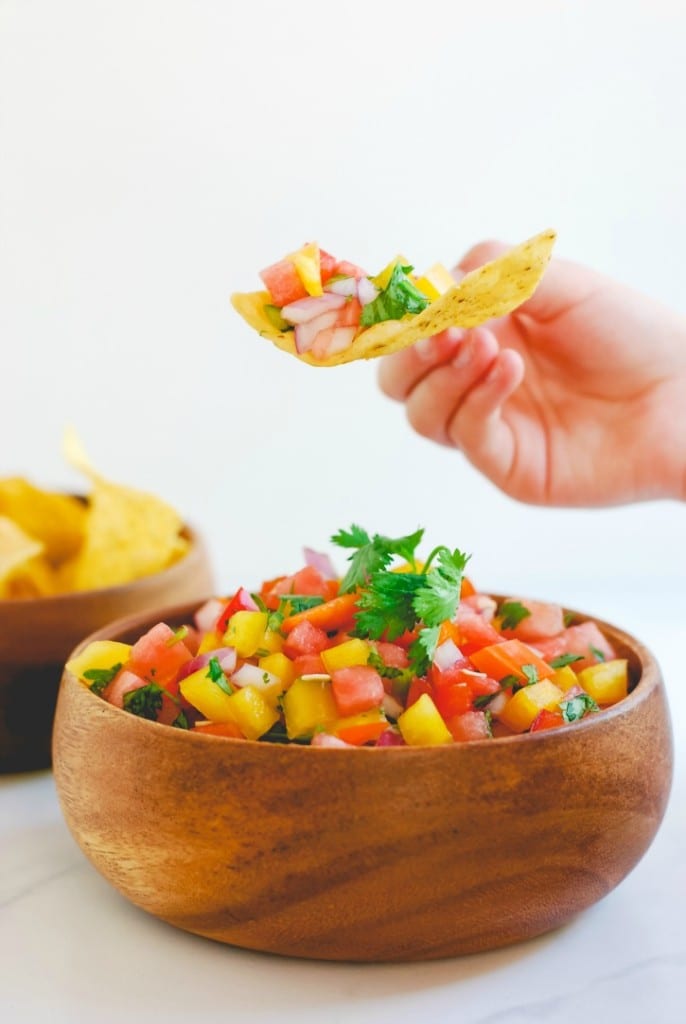
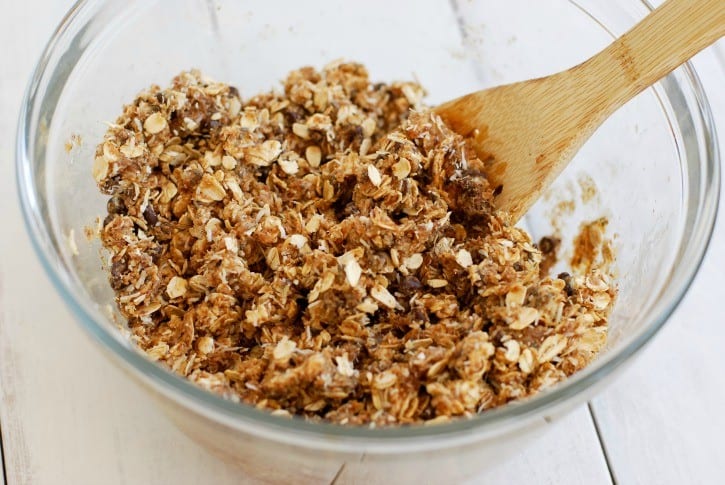
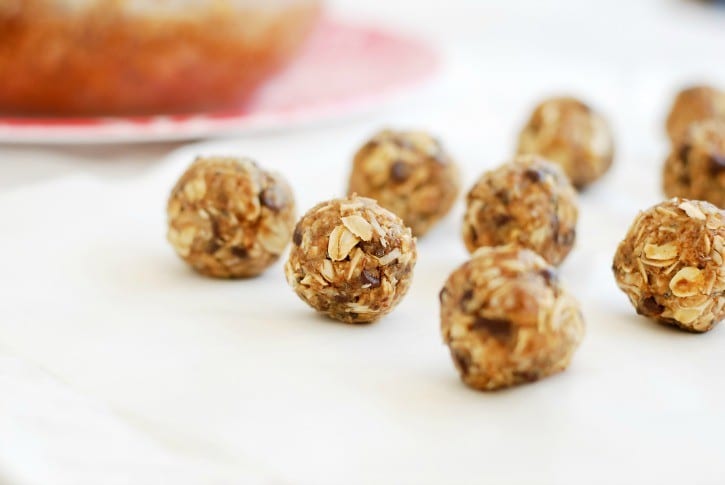
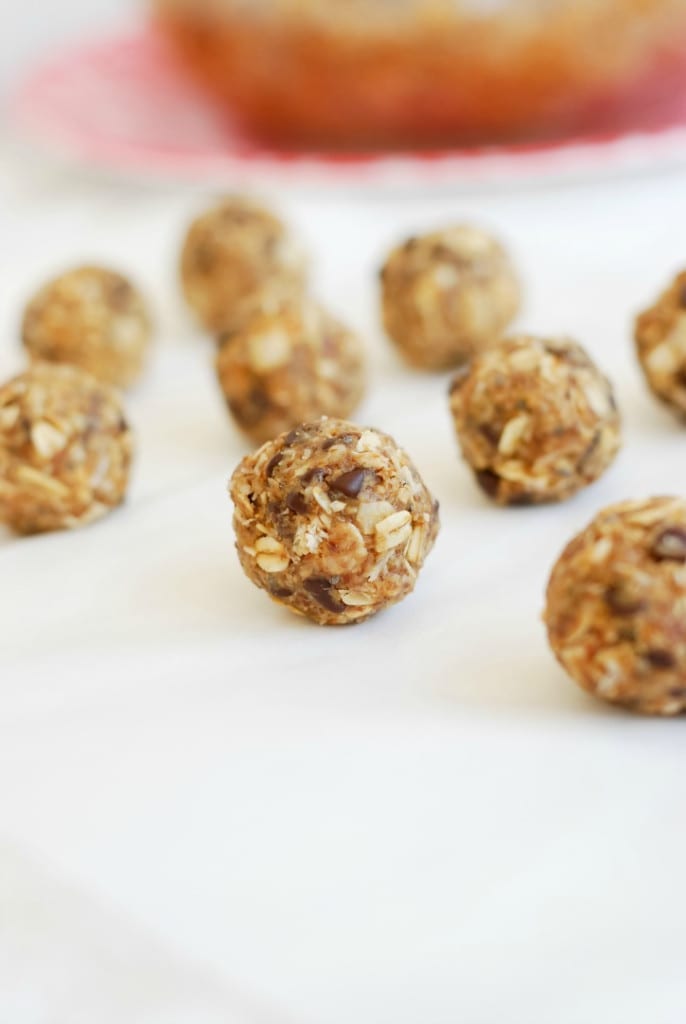
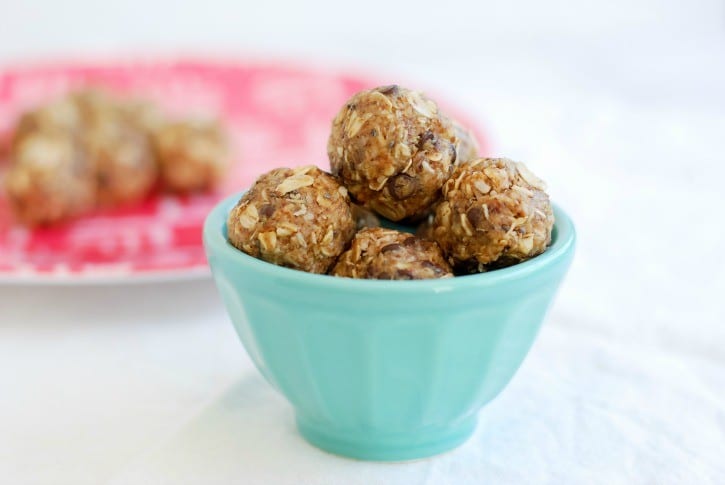
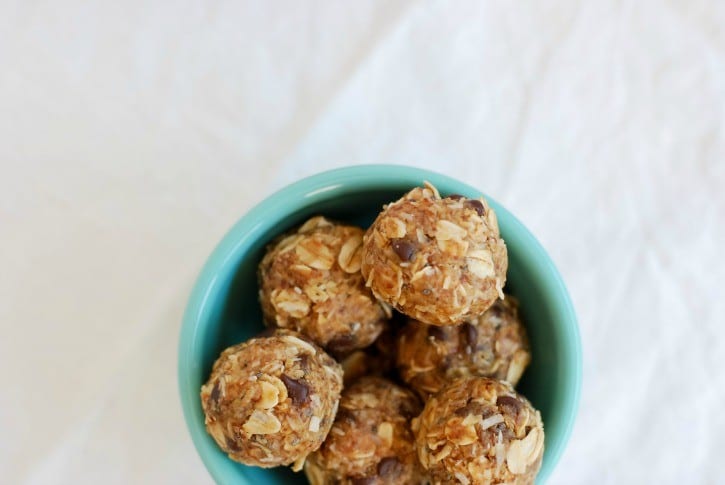
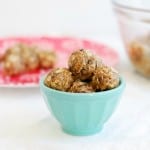
Protein Packed Energy Bites //

There are few things I enjoy more than whipping up something delicious for my four little ones. I love knowing the ingredients that go into the foods that nourish their bodies. I also love the sweet smiles on their cute little faces when they bite into homemade treats! 

Protein Packed (No-Bake) Energy Balls

This recipe is a simple one that the kids can even help with. With only a handful of healthful ingredients — this snack can be made in minutes. Their little hands are perfect for rolling the (no-bake) mixture into bite-sized balls. 

Protein Packed Energy Bites (Simply Happenstance) #energyballs #nobake #healthysnacks-19

I must admit, once you take your first bite, you may feel a little guilty! It’s sort of like eating a ball of cookie dough… only this time, you don’t have to sneak it!

Protein Packed Energy Bites (Simply Happenstance) #energyballs #nobake #healthysnacks #kids

Oatmeal, flaxseed, chia seeds, natural peanut butter, unsweetened coconut, raw honey, and chocolate chips make up the ingredients. The kids will have no idea that you are really filling up their bellies with protein-packed energy food!  

Protein Packed Energy Bites (recipe on Simply Happenstance) #energyballs #nobake #healthysnacks

These energy bites are great served as part of breakfast, packed in school lunches, eaten as an afternoon snack, prepared for upcoming road trips, for a fun day hiking, or an outing to the beach. (In fact, these little goodies will be accompanying my little girl on her field trip today!)

Protein Packed Energy Bites (Recipe via Simply Happenstance) #energyballs #nobake #healthysnacks

There are so many ways that you can customize these energy balls to make them your own! Try adding nuts, pretzels pieces, dried fruit, white chocolate, peanut butter chips, and/or endless other ingredients! (Just make sure to add enough nut butter and honey to bind it all together.) Enjoy! 

Protein Packed Energy Bites (Simply Happenstance) #energyballs #nobake 

Print Recipe

Protein Packed Energy Bites

Prep Time10 minutes mins
Total Time10 minutes mins
Course: Healthy Snack
Servings: 20 -25
Author: Simply Happenstance

Ingredients

  • 1 cup dry oatmeal
  • 2/3 cup unsweetened coconut flakes
  • 1/2 cup peanut butter or other nut butter
  • 1/2 cup ground flax seed
  • 1/2 cup mini chocolate chips
  • 1/3 cup raw honey
  • 1 tablespoon chia seeds
  • 1 teaspoon vanilla extract
  • Pinch of sea salt

Instructions

  • Mix all ingredients together in a medium-sized bowl until thoroughly combined. Cover with plastic wrap and chill for at least 1/2 hour.
  • Once chilled, roll into balls (I used a 1" cookie scoop to make mine bite-sized for the kids). If the mixture isn't forming/staying in a ball, simply add a bit more honey to bind it all together.
  • Store in an airtight container and keep refrigerated for up to 1 week.
  • Enjoy!

Notes

Recipe adapted from: https://www.gimmesomeoven.com/no-bake-energy-bites/

 sarasignature3 copy


Filed Under: Food

DIY Oatmeal and Lavender Bath Soak

March 4, 2015

DIY Oatmeal and Lavender Bath Soak  simplyhappenstance.com #DIY #bath #moms #oatmeal #lavender
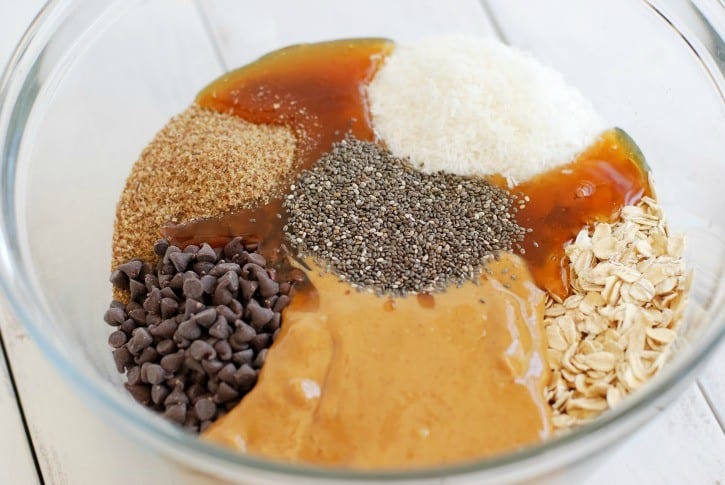
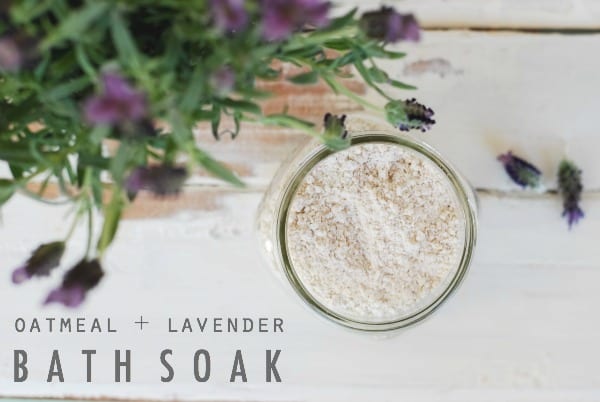
DIY // Oatmeal and Lavender Bath Soak

Yay… It’s mid-week! All I’m dreaming of is a little rest, relaxation, and a warm bath {alone} tonight! If you’re a mom, you’ll especially appreciate the “alone” part! Am I right? It seems that every time I draw a bath for myself, I have at least a couple of my kids come in, splash their hands in the water, and ask if they can take a bath. It’s far from relaxing! So tonight, my plan is to take a secret bath {when everyone falls asleep}, immersing my body in this simple DIY bath soak! 

I love a good bath soak, but they can be expensive to buy… and sometimes there are unwanted added ingredients. I first made this Oatmeal and Lavender mixture for my littlest guy, Finn, over Christmas. He had pneumonia and ended up with an itchy rash all over his body from an allergic reaction to the antibiotics. On Christmas morning, my heart was broken looking at his sweet face and little body. He was literally covered in an uncomfortable rash from head-to-toe. I decided to make my own bath soak to help soothe his skin and lift his spirits. It definitely did help, which is partly why I’m sharing it with you today! 

DIY Oatmeal and Lavender Bath Soak  simplyhappenstance.com

I have since made this recipe a few times. I have used locally grown dried lavender, as well as, {kid-safe} lavender essential oil, from Plant Therapy. The bath soak has turned out great, regardless of which kind of lavender I have used. So my advice to you, is to use whatever you have on hand, or can find easily! [Read more…]

Filed Under: Lovelies, Simply Obsessed

Next Page »
  • Email
  • Facebook
  • Instagram
  • Pinterest
  • RSS
  • Twitter

About

bioSara and Nicole are sorority sisters that simply “happened” to end up in the same small town. They have many things in common, which have set the tone of their blog. They hope that you will join them in their journey of motherhood, dreams that may be, the daily life, and their passion for cooking, yoga, fashion, and design!

SIgn Up For Our FREE Newsletter!

Sign up to receive email updates and to hear what's going on with Simply Happenstance!

Categories

Archives

recent pins

  • 19 Core-Strengthening Exercises | POPSUGAR Fitness
  • For rapid leg weight loss, a combination of intense cardio and targeted leg exercises is key. High-impact activities like running, cycling, or jumping rope burn calories and reduce overall body fat. Adding exercises like squats, lunges, and leg lifts tones and strengthens the leg muscles, giving them a more defined, lean look. Pairing these exercises with a healthy, balanced diet will accelerate the process.  #RapidLegWeightLoss #SexyLegs #FitnessJourney #LegToning #FatBurning #StrongLegs #CardioForLegs #HealthyLifestyle #LegDayWorkout

Copyright 2015 • Simply Happenstance • Grits Design


All personal images and videos are copyright to Simply Happenstance. All other images are copyright to their respective owners.
We would love for you to use our images, but please cite www.simplyhappenstance.com.