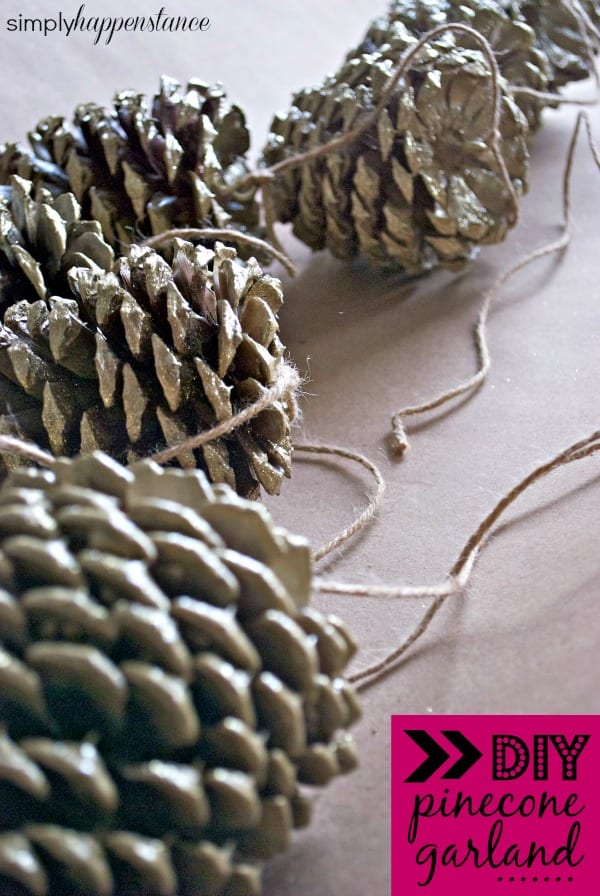
Since moving to the mountains a few months ago… I’ve completely fallen in love with pinecones! Of course, where we live… there’s an abundance! I knew for the holidays I wanted to make a pinecone garland because it looks natural, and fits perfectly in our new mountain setting. I figured the garland would last through Thanksgiving and Christmas, serving as winter decor, as well! To make it a bit more festive… I added some gold paint and sparkles… because I am just a tad obsessed with gold {in case you didn’t already know that – wink, wink}… and all things sparkly!
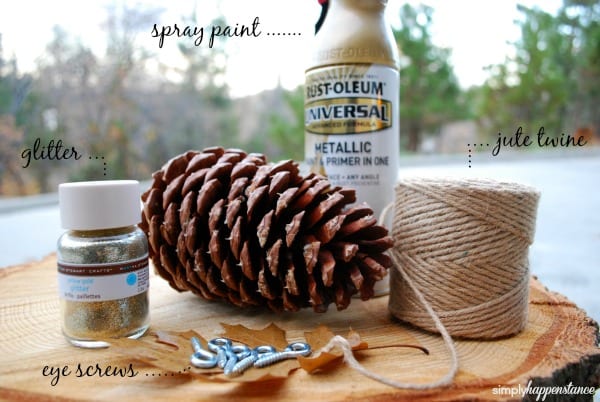
So, for this lovely DIY… you will need only a few supplies which can be purchased at a hardware store {such as Home Depot}, or craft store {such as Michael’s}. You will need: spray paint {I used gold metallic}, glitter {I used Martha Stewart’s Yellow Gold}, eye hook screws {the size depends on the size of your pinecones}, and jute twine, string, or ribbon.
Let’s get this started! Here is what you’ll need to do:
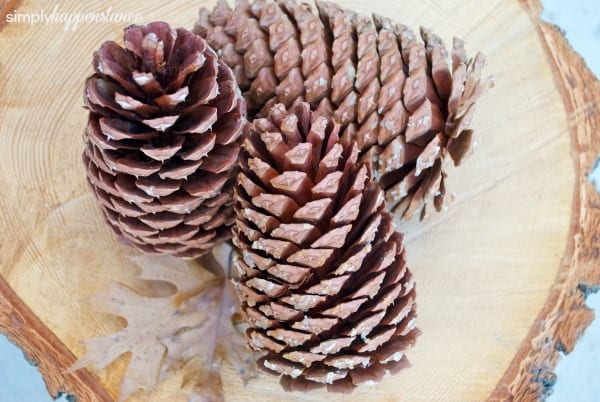
- Plan a day, and go on a nature hike to find a good selection of pinecones {or purchase at your local craft store}.
- If your pinecones are fresh, and not yet dry…. you will need to do the following: on an baking sheet lined with aluminum foil, bake the pinecones in your oven for 1 hour at 250 degrees. {Your house will smell lovely!}
- Allow your pinecones to cool completely before working with them.
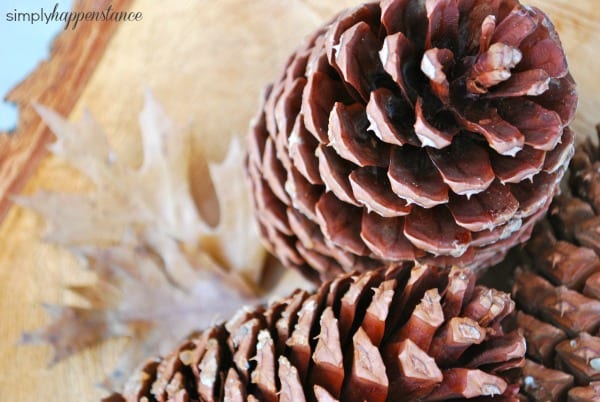
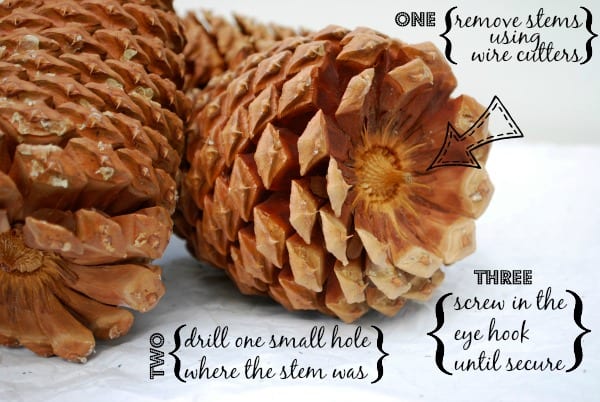
- Remove any woody stems, that may be present, at the top of the pinecones using wire cutters or a similar tool.
- Next, either screw in your eye hooks using a pair of pliers, or start a small hole using a drill… and then screw in your eye hooks.
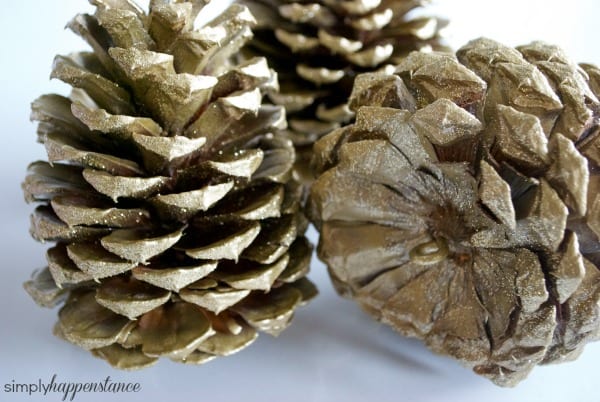
- In a well ventilated {prepped} outdoor area, apply a layer of spray paint to your pinecones {coating the eye hooks, as well}.
- If your look is achieved, sprinkle on glitter while the pinecones are still wet and tacky.
- If you need another coat of paint, apply a 2nd coat {according to the paint can’s directions} before sprinkling with glitter.
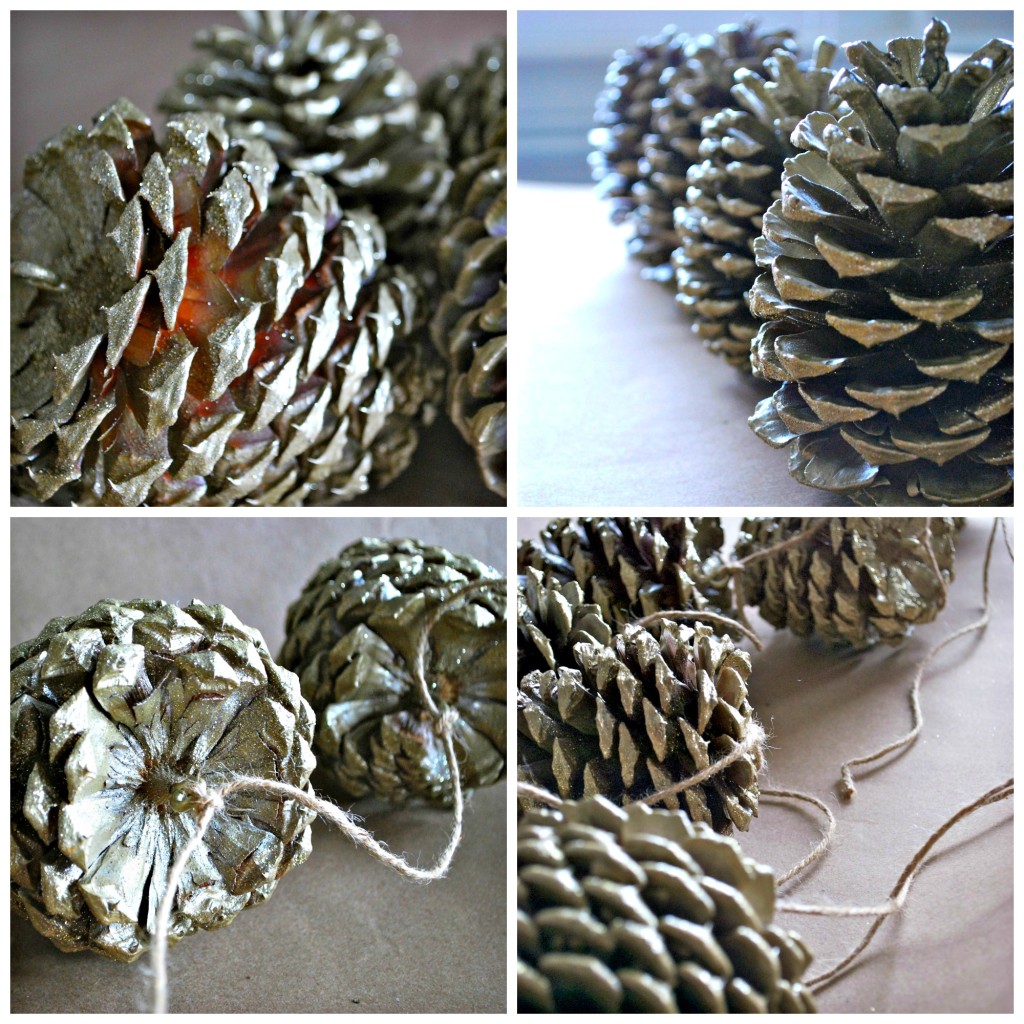
- Allow pinecones to dry for at least 24 hours.
- String your pinecones, using the twine, spacing them according to your personal preference {I used 9 medium sized pinecones and spaced them approximately 6 inches apart}.
- Use a simple square knot to secure each pinecone into place.
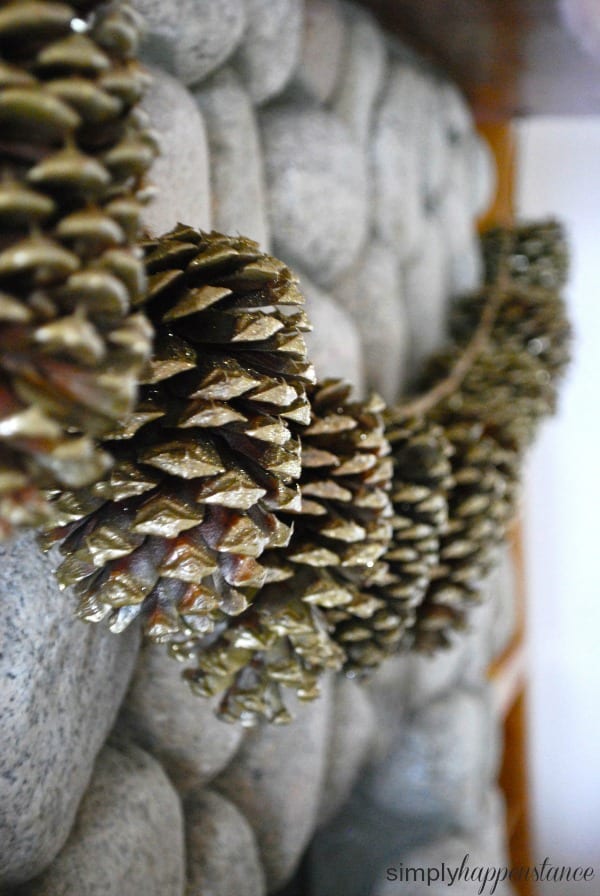
- Drape your dazzling pinecone garland somewhere in your house to add holiday and seasonal cheer!

I love this… natural and beautiful! And what a fun project to do with kids, epecially the nature hike part. (smile) Thanks for sharing!
Oh Jenny… you are the sweetest for stopping by our blog! Your support means so much to both Nicole and I! It was definitely a fun project! The kids did help with picking out all of the pretty pinecones {the fun part}! Nature hikes are the best! xoxo
SO SIMPLE!!! My family is going to use gold gliterry pine cones to help decorate our Thanksgiving table too! We can re-purpose them into a garland too!!! I loveeee crafts likes these!!
Hi Andrea! That sounds like the BEST idea! In fact… I was at West Elm last week and saw that they displayed a combination of gold & natural pinecones in a bowl as a centerpiece! So smart to then turn your Thanksgiving decoration into garland for Christmas! Brilliant! Thanks for stopping by our blog and commenting! xo
What a fun winter decor idea! Love it. 🙂
Thanks, Melinda! It’s so simple… yet so pretty! Perfect for this time of year! xo
Thanks for the awesome idea. I picked “too many” pinecones for another DIY project and this is perfect!
Yay, Lisette! This will be the perfect project for you then! If you make it… please come back and let us know how it turned out! xo
I love this garland. I am going to make this. I also have a cabin in the mountains. This will look so natural there. Thank you, Donna
It will look beautiful in your cabin, Donna! Let us know how it turns out if you make it! Thanks for stopping by our blog!
I love pinecones and garland, so I love-love-love this project. Thanks for sharing. xo
Yay! So glad that you like it, Kelly! We LOVE all of your fun and creative projects! xo
Thank you for showing us step-by-step how to do this. I was wondering how to get the pine cones onto twine to make garland. We moved from Wisconsin to Florida last year and I didn’t get home sick until I was going to church Christmas eve in flip flops. It just didn’t feel right! I miss my 4 seasons!! This year I’m making it a point to decorate and bring a snowy northern woodsy feel to the inside of our home. A friend let me take a bag of pine cones from her yard for a craft and think this is it. I’m going to use white paint & glitter for a snow effect. Maybe even put some snowflake ornaments on the garland strand too. Thank you for the inspiration! It may be warm outside, but it’s will be a white winter in our home 🙂
Oh, Summer! I really hope that the pinecone garland helps you get into the holiday spirit and makes sunny Florida seem more like home! I know living in Southern California… Nicole and I struggle with the same thing. In fact today was seriously 86 degrees outside! You’re the sweetest for stopping by our blog and commenting! Happy holidays to you and your lovely family! xoxo
Your article helped me a lot, is there any more related content? Thanks!
I don’t think the title of your article matches the content lol. Just kidding, mainly because I had some doubts after reading the article.
Thanks for sharing. I read many of your blog posts, cool, your blog is very good.
Your point of view caught my eye and was very interesting. Thanks. I have a question for you. https://accounts.binance.bh/register/person?ref=QCGZMHR6