>>> Bow Bun Hair Tutorial <<<
One of the greatest joys in having our blog
is the opportunity to share with you
businesses, products, & expertise,
from trusted friends & companies that we believe in!
We are so excited about this post…
as it is our very first hair tutorial on {simply}!
It comes to you as a guest post
from one of our dear friends, Lynne!
She owns a small business
selling beautiful, high-quality, handmade… hair accessories!
She also designs custom hair accessories to match & compliment
fabric swatches, uniforms & recital outfits!
You can reach Lynne and view her items for sale through her
Lavish Lulu website,
Etsy Shop,
&/or
Facebook page!
A big “thank you” to Lynne for this darling hair tutorial!
She seriously makes everything look so easy!
Her daughter is one lucky little girl to have such a talented mama!!
>>>>>>>>>>><<<<<<<<<<<
Hi, my name is Lynne!
I am a former teacher
and now a stay-at-home mom to my two beautiful children.
I’m also own a small business,
{Lavish Lulu}!
Growing up, my mom kept my hair short…
the “Dorothy Hammel,”
and I always envied my friends with long hair.
I swore my daughter
{if blessed with one},
would have long, beautiful hair!
I have been having fun experimenting with her hair,
and I have been asked to share one of our favorites with you!
One of my daughter’s favorite hairstyles to wear to school and dance is the
“Bow Bun!”

This may look difficult to do,
but it is just the opposite with the right tools
and the right length of hair.
This style works best on hair that is just past shoulder length
{if your daughter’s hair is shorter than shoulder length,
then I suggest just pulling the front hair back
and doing it as a half-up hairstyle}.
*********************
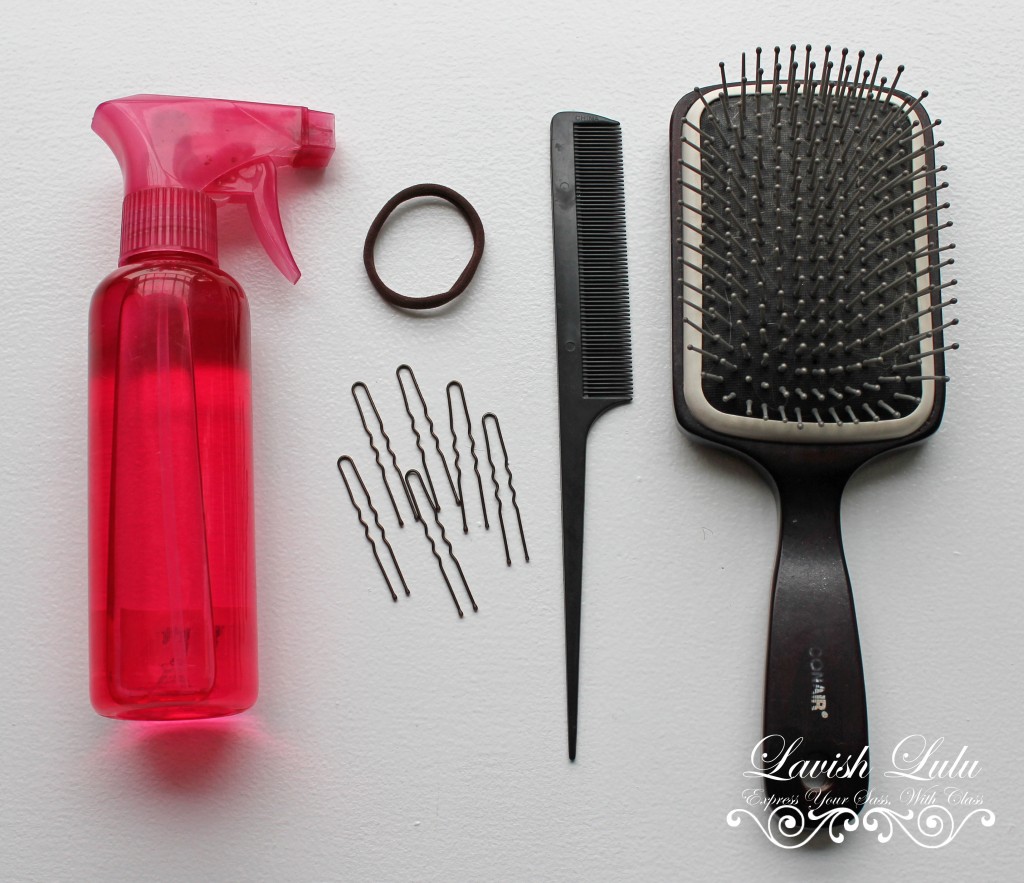
{WHAT YOU WILL NEED}
* a paddle brush
* a fine-toothed comb
* hairpins {not bobby pins}
* spray bottle filled with water
* and hair band {without metal}
{TUTORIAL}
Start out by using your brush to make sure hair is tangle-free.
Dampen the hair thoroughly with the spray bottle to help manage the hair.
Use the fine-toothed comb to smooth the hair into a ponytail
wherever you would like the bow to sit.
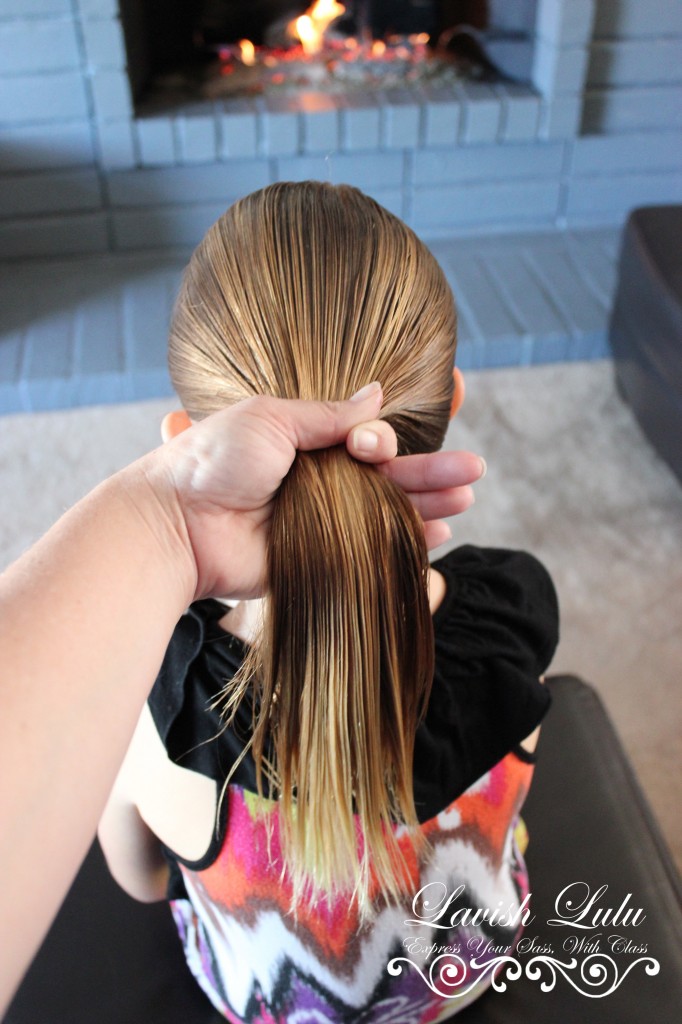
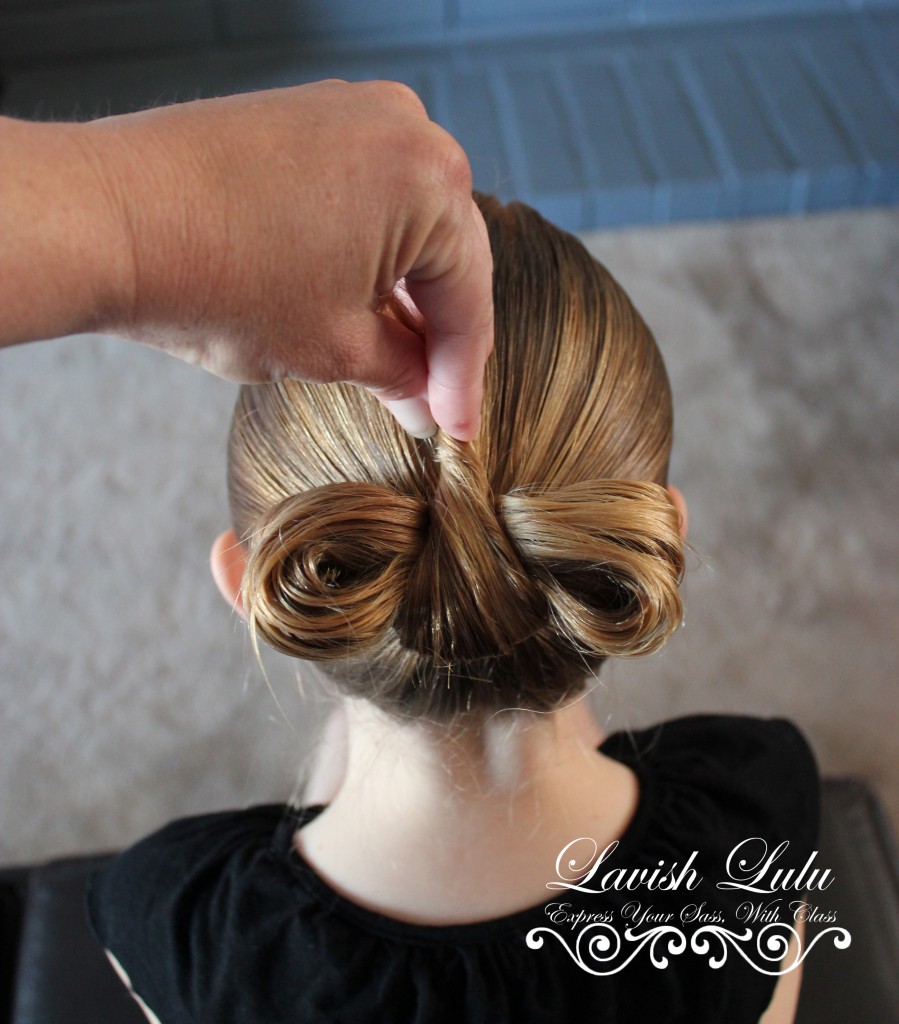
Begin to wrap the hair band just like you are putting the hair into a ponytail.
On your last twist, do not pull the hair all the way through.
Instead, create a loop, and leave 3 inches or more of hair
tucked under the band and hanging out
{I found the bow looks and works best
if the extra hair is left hanging out the bottom of the pony}.
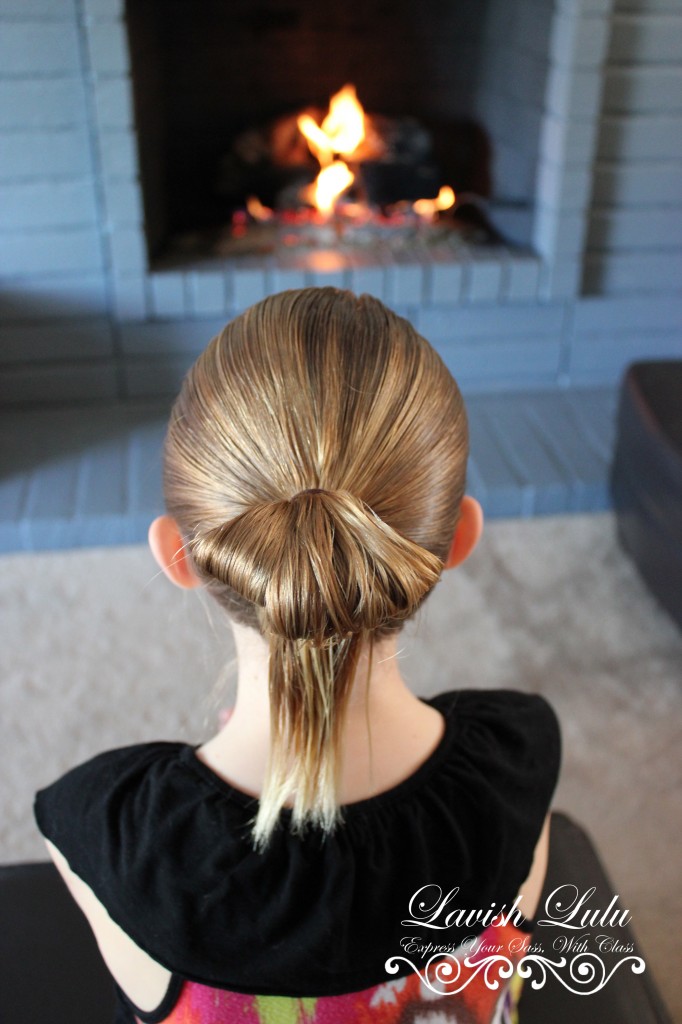
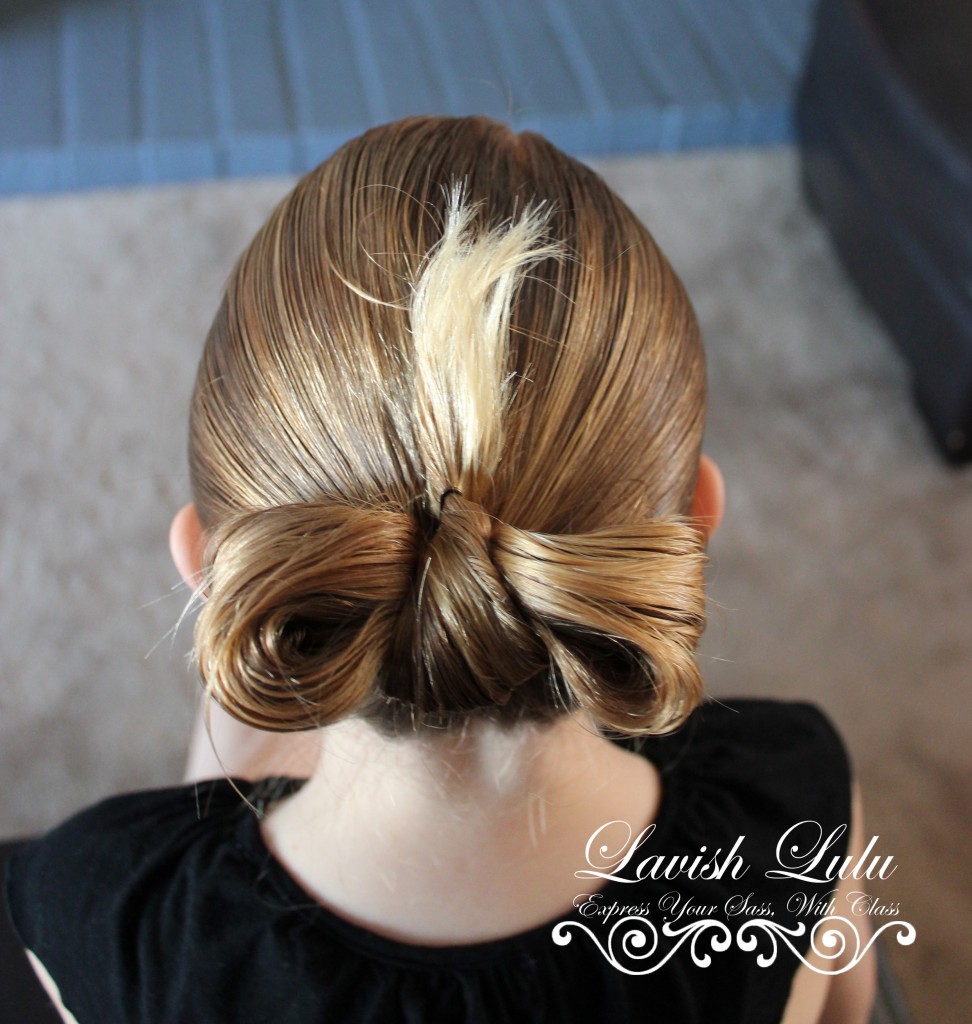
Divide the loop into two even loops.
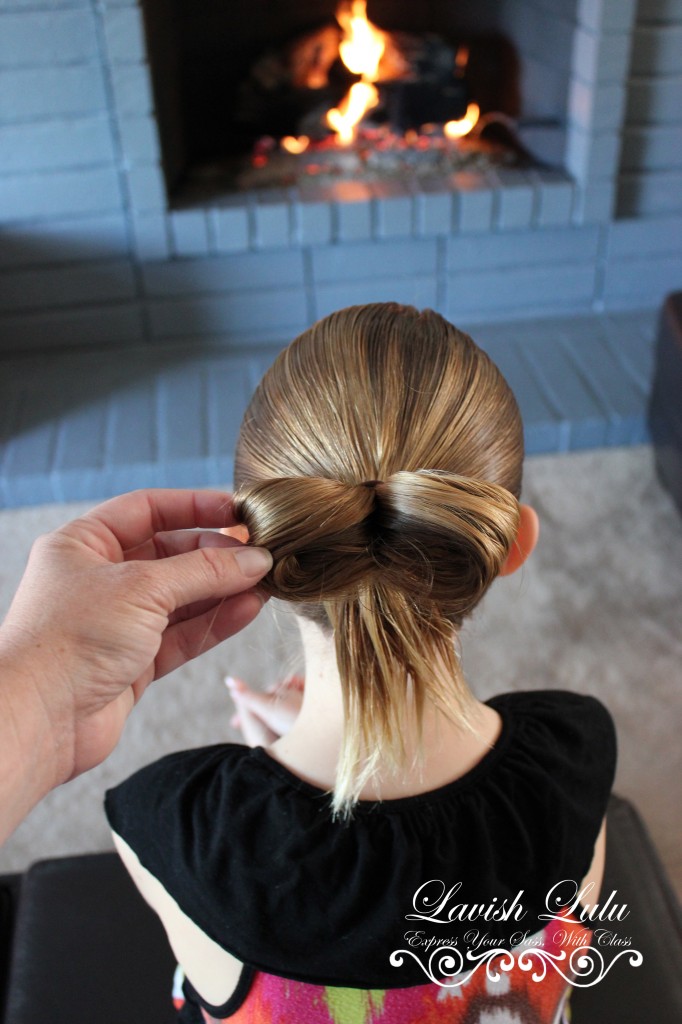
Grab the remaining hair from the bottom of the hair band
and lift through the center of the two loops twisting it slightly.
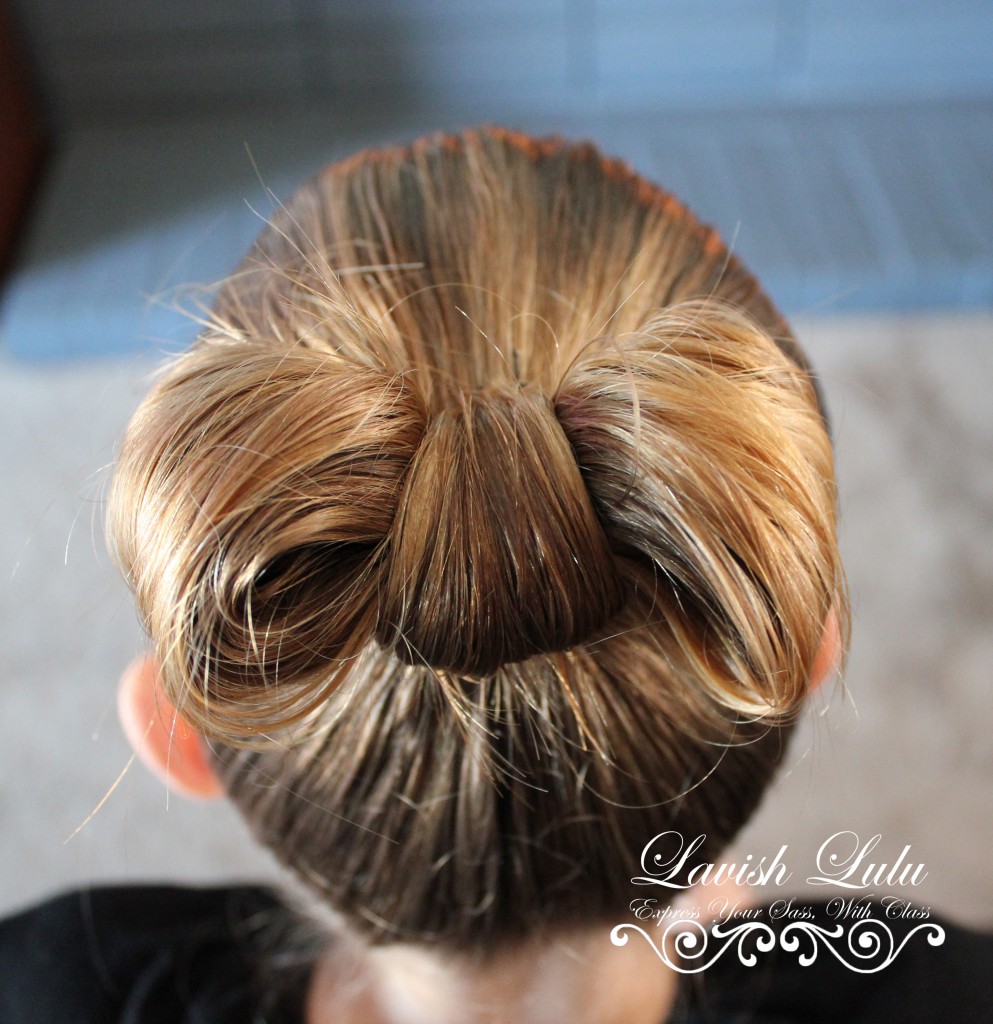
Secure the hair in place with hairpins
{depending on the thickness of your daughter’s hair,
you may need to use a few extra}.
Continue to wrap the hair around the base of the ponytail
and pin where needed to keep securely in place.
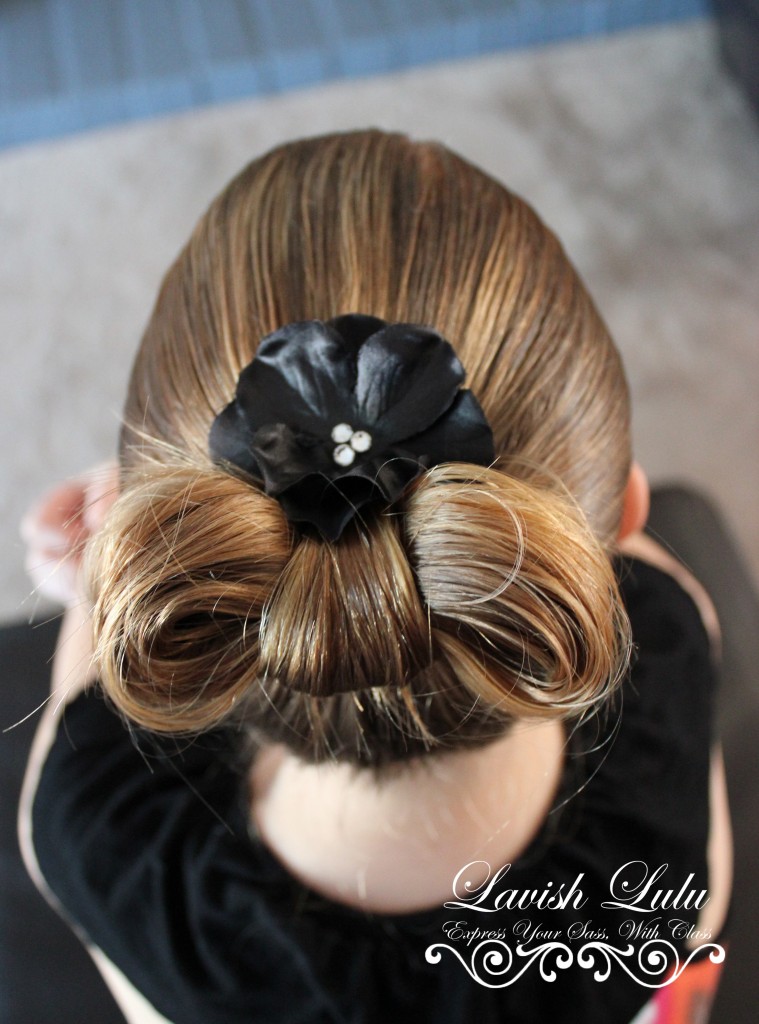
You’re DONE!!!
…unless your daughter is a girlie-girl like mine
and has to finish off just about every hairstyle
with flowers and rhinestones!
>>>>>>>>>>><<<<<<<<<<<
Once again…
here are a few ways to contact Lynne at Lavish Lulu to
view her handmade hair accessories for sale
{if you are a fan of Facebook,
she has auctions regularly with fantastic deals & incentives}!!!